
PULLING E-PLEDGE REPORTS
By following these steps, you will be pulling your own campaign reports in no time!
- Navigate to: https://ebusiness.unitedwayfoxcities.org/Begin.jsp
- Log in with your Campaign Credentials.
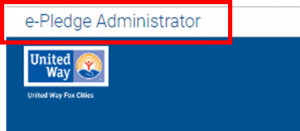
- Change your role from “Employee Donor” to “e-Pledge Administrator” by clicking the “e-Pledge Administrator” button.
4. Once the new page loads, hover over “Reports” on the top banner and choose which report you’d like to run.
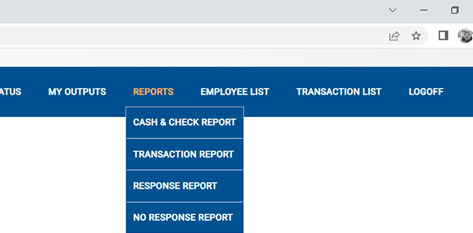
The two reports that you will most likely find to be the most helpful are:
- Response Report
- This shows all employees who have “responded” to the campaign by making a pledge or selecting “No Gift”.
- You can also customize this report to include those who have NOT “responded” to the campaign (no action has been taken at all).
- This report can also show last year and current year pledge, date of pledge, and other pieces of information specific to the donor.
- Transaction Report
- This report is similar to the Response Report but doesn’t have the capability to show some fields, but can show other fields not available on the Response Report including:
- Type of Pledge (Payroll Deduction, Check, etc).
- e-Pledge opt-ins (“Flags”) which would show their interest in our Donor Networks (Emerging Leaders, LINC, Leadership Givers) or if they have interest in our Endowment or Circle of Caring programs.
- This report is similar to the Response Report but doesn’t have the capability to show some fields, but can show other fields not available on the Response Report including:
The instructions below will pertain specifically to the Response Report. However, many of the details are relevant to other Report options as well.
Once you have selected the report, a new page will load and you will want to make sure to take the following actions:
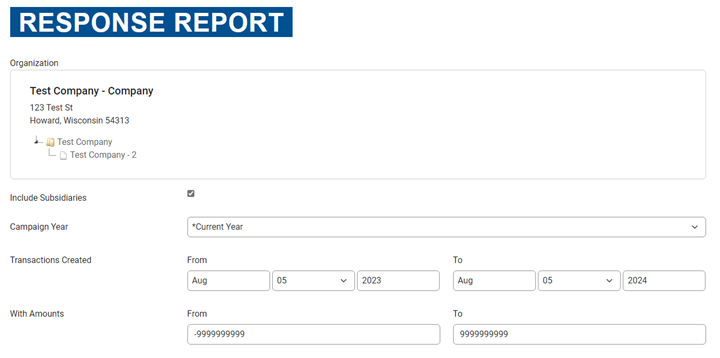
- If your Organization has multiple locations that run campaigns, you will see those locations branch out below the Organization Name (see “Test Company – 2” below)
- If you wish to report out on all locations at once, check the box next to “Include Subsidiaries”
- If you wish to report out on a specific location, click that specific location within the tree. The page will then repopulate and then you can continue designing your report
- Campaign year: Current Year
- Transaction Created: You can customize to show specific dates or it will default to one year ago from the current date
- With Amounts: You can customize this to show specific amounts, or it will default to show all amounts
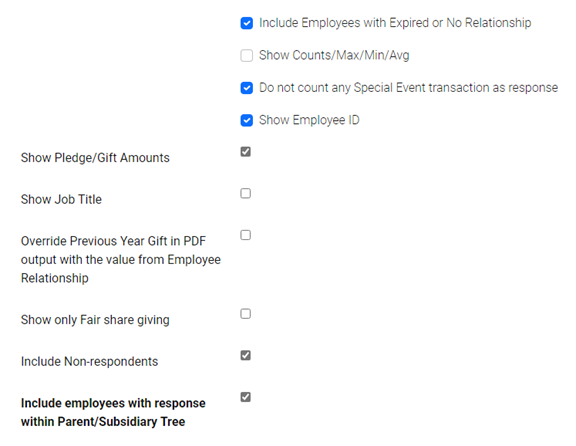
The next menu of checkboxes allow you to customize your report further.
- Include Employees with Expired or No Relationship: This will most likley not need to be checked if you are running reports during your campaign. However, if you run reports months after the campaign, it is recommended to check the box to ensure that it includes anyone who may have left the organization.
- Show Counts/Max/Min/Avg: This functionality would provide sums at the bottom of columns as well as the Maximum, Minimum and Average pledge if that is information you’re interested in.
- Do not count any Special Event transcation as a reponse: If this box is checked, it will not count any Special Event gifts (shirts, raffles, etc) as a “response” within the Campaign.
- If an employee only participates in a raffle, but does not make an actual pledge, and you check this box when pulling the report, that specific employee would show as not having “responded” to the campaign itself.
- Show Employee ID: If you wish to see the Employee IDs on your output file, check this box.
- This field is dependent upon us receiving the Employee IDs as part of the completed Employee File or existing within our system prior to the campaign.
- Show Pledge/Gift Amounts: I would recommend checking this box to ensure that your output shows their actual gift information.
- Show Job Title: This field is completely optional and will only populate information if we receive the employee’s Job Title information as part of the completed Employee File or if it existed within our system prior to the campaign.
- Override Previous Year Gift in PDF output: We do not recommend checking this box.
- Show only Fair share giving: This field will only show respondents whose gift meets or exceeds the value entered into the “Suggested Gift” field in our database.
- The Suggested Gift would have to be included in the completed Employee File in order for this checkbox to function.
- Include Non-respondents: If you check this box, those individuals who have not “responded” to the campaign would be included in the output file. It is recommended to check this box to have a report that is as robust as possible – one that will show both those that have responded and those that have not.
- Include employees with response within Parent/Subsidiary Tree: It is recommended to check this box if you have an Organzation with multiple locations to ensure that any employee who may have been moved from one location to another appropriately pulls onto the report.
Below is a screenshot of recommendations:
You can then further select which Transaction Source you’d like to see (ePledge or Paper), as well as which report types you’d like to have output (PDF or CSV). It is recommended leaving both set to “Both”.
You can add information you’d like into the Description field as this information will show in the report history page to help you find prior runs of the report. You may want to put unique information as to details of that specific run of the report or the date into this field to aid in finding specific historic reports in the future.
You then can get as granular as you’d like in choose the actual columns that appear in your output report by clicking the “Select CSV report columns” option.
*Note: It is recommended to remove “Last Year Gift (EmpRel)” as it will most likely populate with a 0 but you will still be able to see the prior year’s gift in the “Previous Year Total Pledge (Transaction)” column.
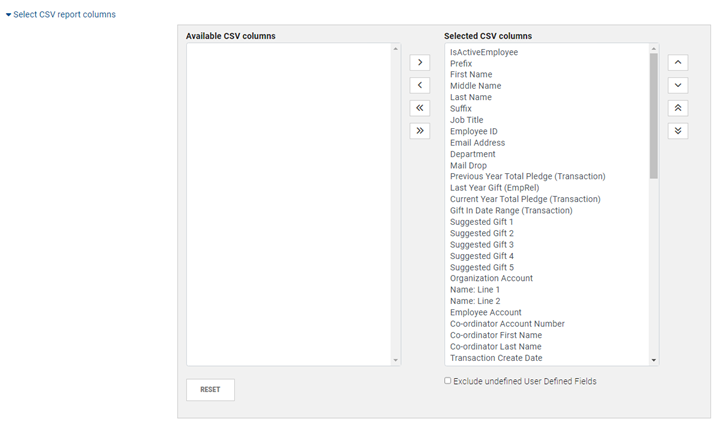
Once all your parameters have been selected, you can click “Submit”. The report(s) will then begin to pull and it/they should be ready in a minute or two.
You can see your reports by navigating up to the main tool bar and clicking “My Outputs”.

Once you have navigated to the My Outputs page, you can then click the specific report you wish to open by clicking on its name in the “Names” column.
*Note that the Type column shows if the file type is PDF or CSV.
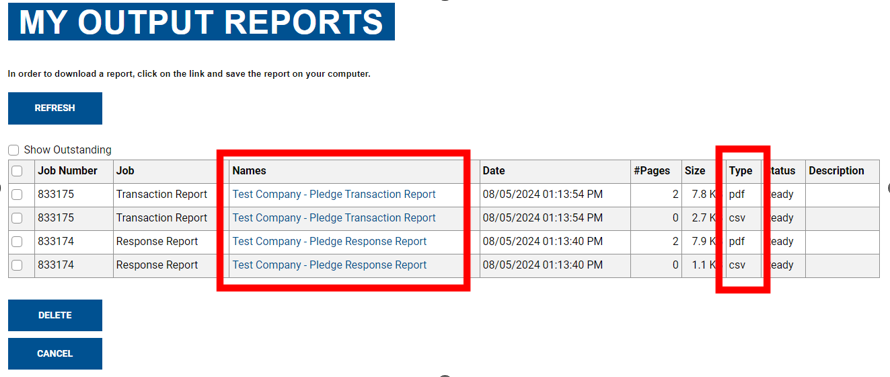
This page might feel overwhelming at first glance, but it’s simpler than it seems!
If you have any questions, please don’t hesitate contact us by emailing andar@unitedwayfoxcities.org. We are happy to help.


